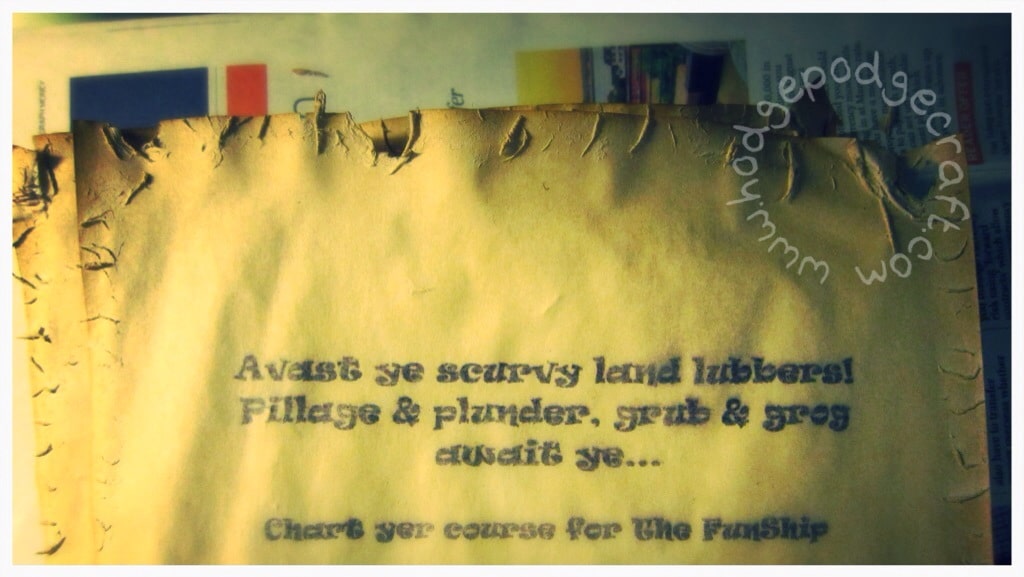
The first in a series of pirate party tutorial posts: how to make aged invitations using tea (including a free Word template)
Yaaarrrr…
Pickle will turn 3 next month and has requested a pirate party. As ever, I have a whole heap of ideas and a limited amount of time, but will do my best to include as many pirate party how-to posts as I can here (plus a round up post with everything linked in, once the party has happened of course)!
Here’s the first of the crafty preparations: How to make pirate party invites (and a treasure map).
You will need:
– a computer with a printer and A4 / letter paper
– strong (cold) tea*
– a baking sheet
– an oven
COST: pennies
AGE: young children +
TIME: 5-10 minutes per invitation
How-to:
- Start by writing your invitation using pirate language (Me vs. the House has some great examples of pirate phrases). You can use this free pirate party invite template as a starting point – just replace all the pink text with your own party details.
- Choose an archaic pirate-style font for your invite. We used Lucida Blackletter, but you could also use an Old English style font, or download a Gothic font for free by following the links at Me vs. the House.
- Check your formatting and details, then print your invitations.
- Preheat your oven to 180c
- Place your first invitation on the baking sheet and pour tea all over it, letting it soak all the way through the paper
- Pour the tea off and then rub around the edges of the paper to make it uneven/slightly torn in places, especially the corners
- Place the baking sheet, with the wet invitation into the oven.
- Keep a close eye on the invitation while it bakes. Mine only took about 3 minutes each to be completely dry and starting to lift off the baking sheet
- Once your invite is ready, take it out and lift off the paper using tongs, or a pallet knife.
- Follow the same process with each invitation, until they are all ‘aged’ to perfection.
https://www.instagram.com/p/f3VFwSmegt/
I also drew a map for our party guests, photocopied and aged it in the same way and included it with the invitations. I gave each of the children their own pirate name (Mister Podge banned me from calling any of them ‘Bloodthirsty’ or ‘Cut-throat’, the spoilsport), but luckily Eriks Deli Cafe blog has some great ideas for (toddler-safe) pirate names.
That’s it me hearties! Now ye know how to make ye olde pirate party invitations.
P.S. What’s a pirate’s favourite letter of the alphabet..?
Aaaarrrrrrrrrrrrr! (of course)
*apparently this can also be done with coffee, but may give the invites a strong coffee scent…


Pingback: Hodge Podge Craft » Avast ye crafty land-lubbers! Learn how to make mini treasure chest box favours for a pirate party…
Pingback: Hodge Podge CraftHow to host a DIY pirate party for toddlers!
Pingback: Hodge Podge / How to make giat salt dough doubloons
Love the ‘Details circle’ idea!
Never tried the oven idea before either – awesome! Usually I’ve made these by hanging them out to try on a clothes line. This is great for making large batches (like for a party) but you have to wait a long time for them to dry. The other option is to print out a template on a color printer – something like this one http://datenightwingman.com/treasure-hunt-date-game
Thanks for the pics!