

How to make the best chocolate hedgehog cake
An easy step-by-step recipe for the best chocolate hedgehog cake, using flakes instead of the traditional buttons.
Made in one (birthday) morning!
I was looking online for the best chocolate hedgehog cake recipe last week, because that’s what Chops had requested for his 2nd birthday (actually, when I asked him what kind of cake he wanted – dinosaur? digger? train? his little face lit up and he suggested “CHOCOLATE?!” – I couldn’t get him to specify further)!
Most of the tutorials used chocolate buttons for the spines, but I saw a photo (no tutorial) of the best chocolate hedgehog cake made using flakes instead and knew that’s what I wanted to do.
Here’s my interpretation and easy tutorial (as usual, I left this to the last minute and just got it finished before the party started!) if you’d like to have a go.
To make the best chocolate hedgehog cake, you will need:
For the cake
200g caster sugar
25g good cocoa powder (I used Green & Blacks)
225g soft butter (at room temperature, or microwave for 10-15 secs)
4 eggs
200g self-raising flour
1 teaspoon baking powder
1 teaspoon vanilla extract
2 tablespoons milk (at room temperature)
To decorate
1 500g tub chocolate frosting (I used Betty Crocker rich & creamy choc fudge)
approx 25 full-size flakes
2 small milk chocolate buttons
1 large milk chocolate button
2 large white chocolate buttons
How to make the best chocolate hedgehog cake:
Bake the chocolate sponge:
1. Preheat the oven to 180°C or 350°F or gas mark 4.
2. Put ALL the cake ingredients apart from the milk in a food processor and whizz it all up together (or use a hand blender), then add the milk a tablespoon at a time, until everything is well mixed.
3. Scrape the batter into a 25cm/10inch loose-bottomed, round cake tin and bake for 20-25 minutes, until risen and firm.
4. Place the cake on a rack to cool completely* before assembling and decorating.
Then:
5. Cut your round cake into sections (using Parsley Soup’s photo guide) and assemble into a hedgehog shape, using frosting dollops to stick the pieces together. She has used a sandwich sponge, but it works just as well with a solid cake.
6. Cover the whole cake with a very thin ‘crumb’ layer of frosting and stick it in the fridge for 30 mins to set.
7. Place the cake on the board that you will be serving it on.
8. Frost the whole cake in a thick layer (and wipe up any smears or blobs from the board – is that just me?)
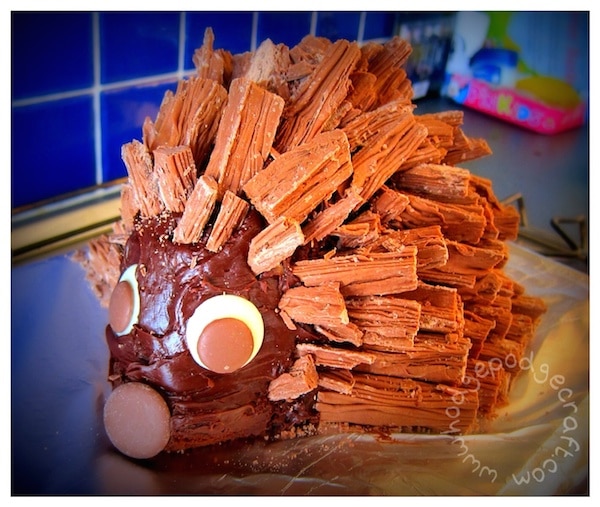
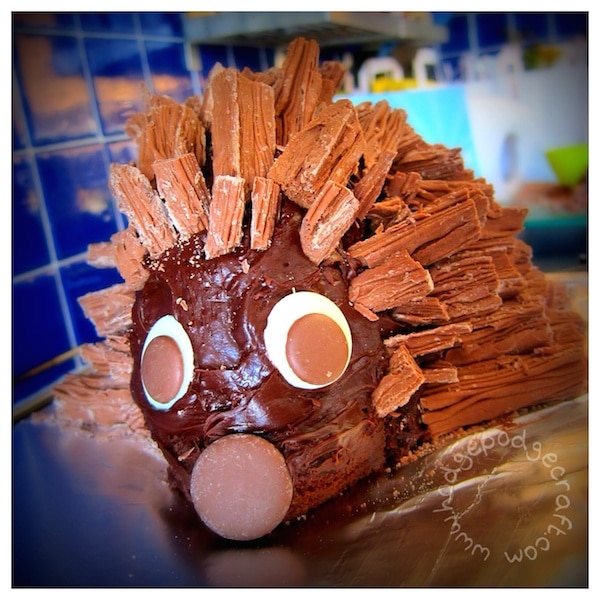
9. While the frosting is still wet, start to add your flake ‘spines’, working from back to front. I used 1/2 length flakes at the very back of the hedgehog, 1/3 length flakes for most of the body and 1/4 length ones at the front, around his face. I found that they stuck better if I thinned them a little by carefully cutting them in half lengthways (some shattered, but I had enough left to stick on and we used the flake crumbs to sprinkle on ice-cream!
10. Stick a large milk chocolate button on for the hedgehog’s nose, then use the smaller milk and large white chocolate buttons to make his eyes (I slightly melted the back of the milk ones by holding them near the lit hob, then stuck them onto the white ones) – once set, I stuck these onto the hedgehog’s face.
And that’s it – easy right? Now you can make the best chocolate hedgehog cake too!
*One of my clever baking friends recommends freezing the sponge at this point, as it makes the cutting stage far easier (though I never allow myself time for this – plus my freezer is jam-packed, so I’d never fit it in!)


Pingback: Fresh Five Week 51 | Tots 100
You are a very impressive woman 🙂 I on the other hand am very lazy and just go to the shops!!
Ahh, but you choose the best treats to buy..! 😉